I purchased this new laptop the other day and was busy setting it up. I don’t know about others, but I usually find it quite thrilling setting up and installing new software. And especially on a machine that I am going to use myself.
My old laptop was getting a little dated and was taking quite a while as I switched from one task to the other. So finally, I decided I needed a new one to save up on time.
My observation is that with a slow machine, you tend to become quite inefficient. And you also waste a lot of time.
I use my laptop for business as well as for development purposes. And I use NetBeans to handle all my development projects. So, I went on their website and downloaded the latest installer. But as soon as I tried installing it, it displayed an error that JDK is missing or it is not installed.
So, I Googled around and found that JDK is needed to run NetBeans.
Downloading JDK
I Googled for the JDK download link. And got these results.
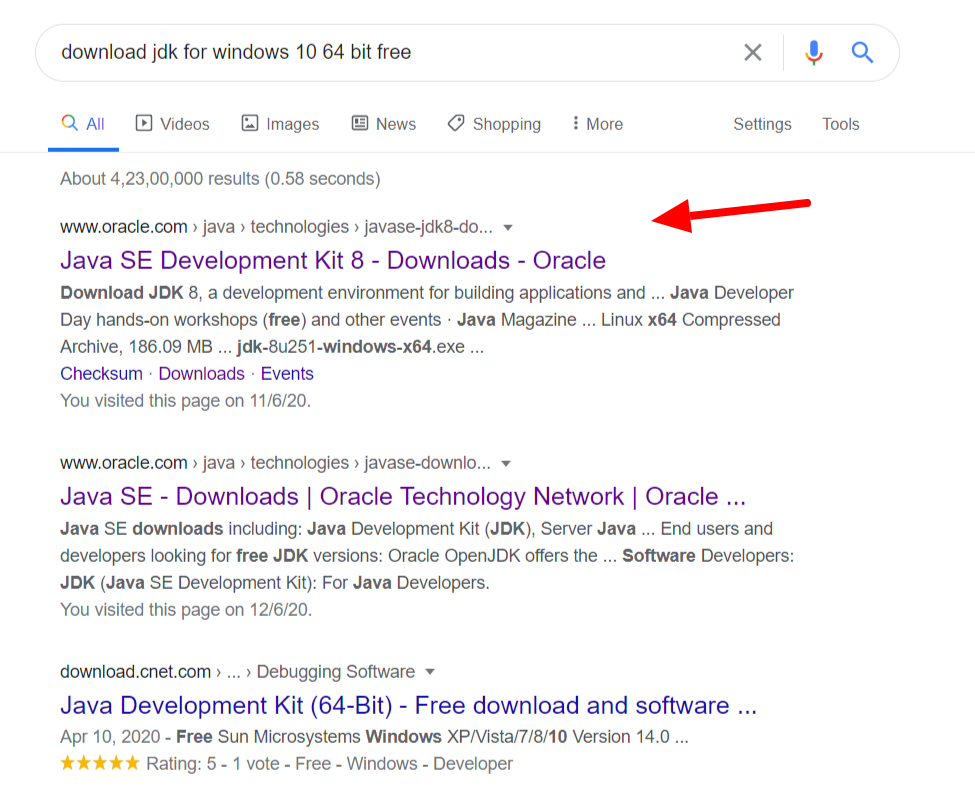
As with most people, I clicked the first result.
And was confronted with this section about “Important Oracle JDK License Update”. Frankly, I was a little skeptical looking at it. I really didn’t know if I am allowed to use it for commercial development purposes.
See the screenshot below:
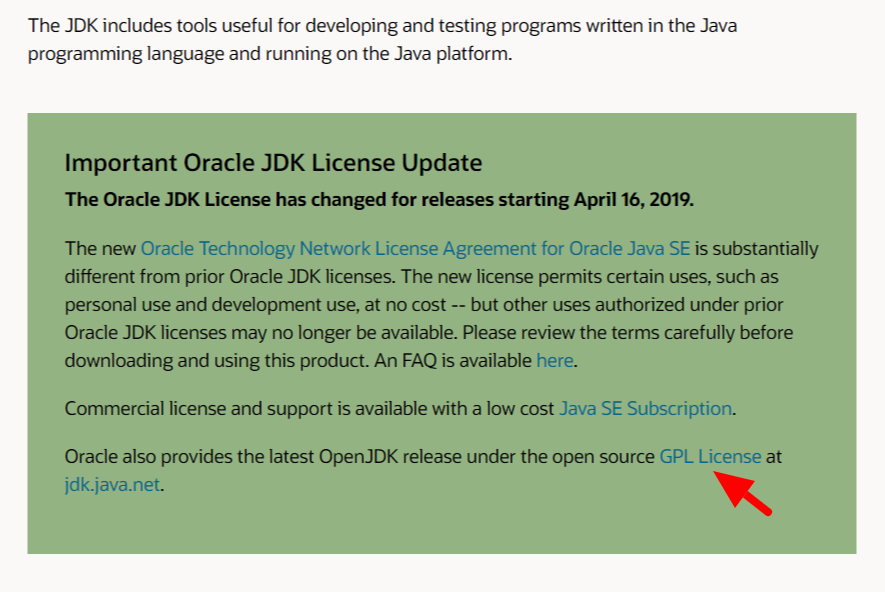
It says, it permits certain uses, such as personal use and development use, at no cost.
I don’t want to use something that is not intended for free commercial use. I don’t want to get into any legal complications. I tried to look up the license thing on Google but couldn’t find any concrete answers on this.
Some tutorials I watched used this version only. So, I am assuming it must be okay to use this too.
If you scrolled down on the page above, you had a list of zipped files that you could download depending on the platform you are on.
But that GPL License caught my attention and I clicked on it. You could not go wrong with a GPL version of the JDK.
Clicking on the above page takes you to a copy of the GPL License agreement. But we want to download JDK, so we go https://openjdk.java.net/
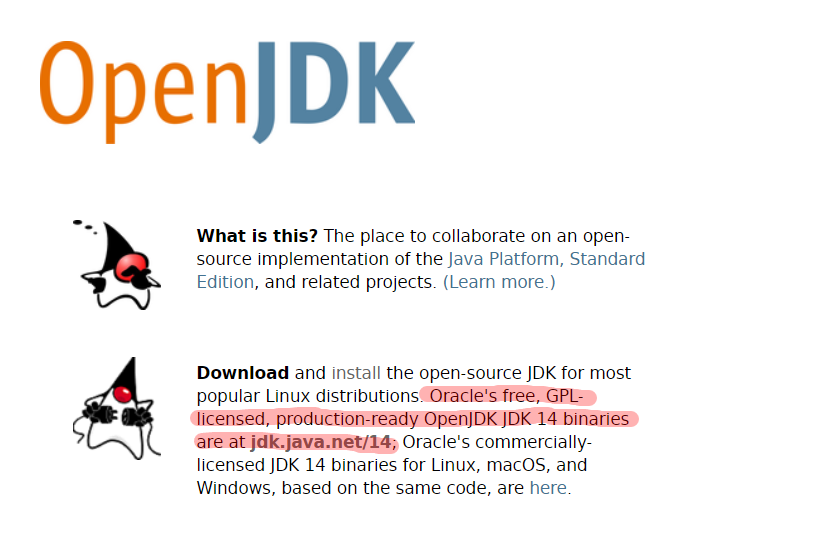
It says it you can download the latest version from https://jdk.java.net/14/
But version 14 is not an LTS (Long Term Support) version. JDK version 8 & 11 are LTS versions. Not sure what difference it makes.
So that that makes JDK 11 as the latest LTS version.
To download it, go to https://jdk.java.net/archive/
The page contains all versions of the Open JDK software for download.
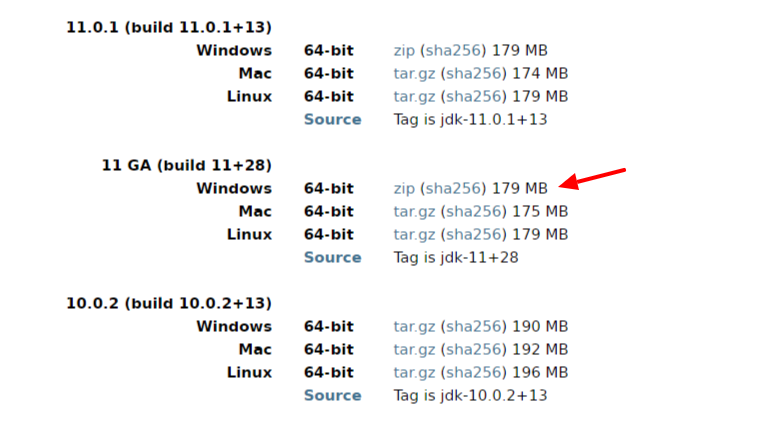
Since I have a Windows 64-bit machine, I downloaded the appropriate install by clicking on the zip file with the arrow above.
It was downloaded to the Downloads folder.
Installing JDK 11 on Windows
I extracted the downloaded zipped file and was surprised that there was not executable file. We are used to executable files for installation. Simply click the setup icon and follow the instructions to install any software.
But it didn’t have any.
I really didn’t know what to do with the files. It took me quite sometime to figure out what needs to be done with it.
That’s why I came up with this tutorial so that it can save you some time.
Do the following to install Open JDK on Windows:
Step 1. Create a folder called Java within the Program Files folder. Then create another folder named jdk-11 within the Java folder itself. So you get a path like this: C:\Program Files\Java\jdk-11\
You can create any folder structure that works for you. But then the path you use would be different for you.
Step 2. The Open JDK zipped file you downloaded and extracted was in the Downloads folder. Copy the contents of the unzipped folder into the jdk-11 folder above.
The bin folder will now have a path similar to this: C:\Program Files\Java\jdk-11\bin
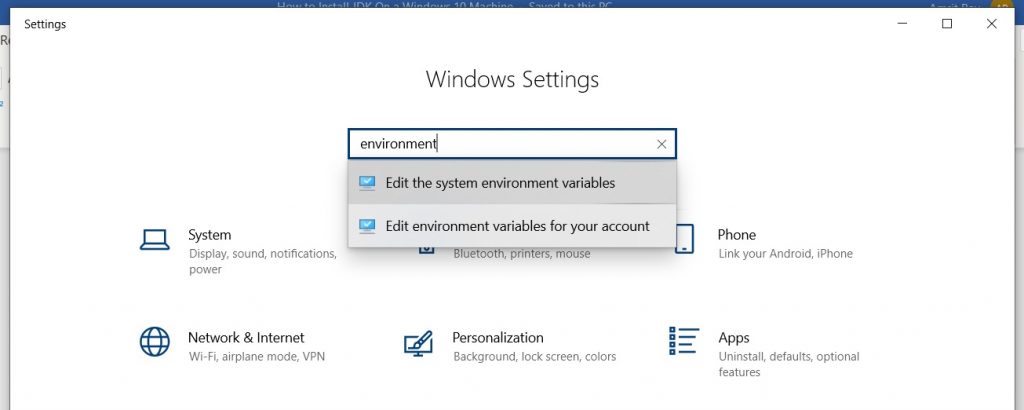
Step 3. In the Windows search bar type, Settings, and press Enter. This will open up the Windows Settings panel.
Step 4. In the “Find a setting” search box, type environment variables, and select the option that says, Edit the system environment variables.
Step 5. This will open the below dialog box.
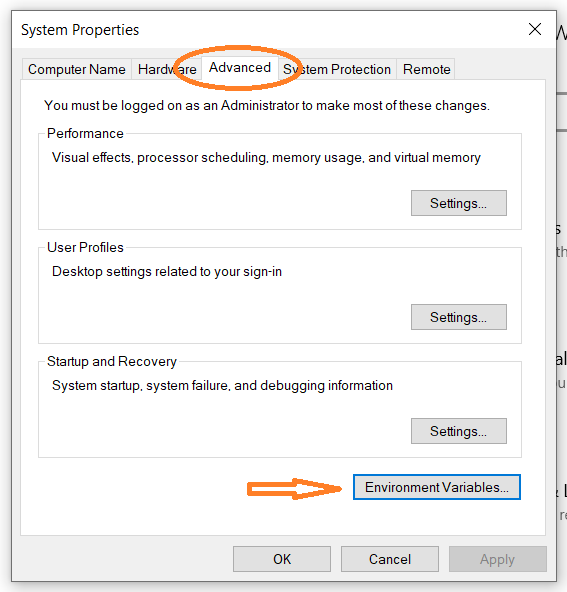
Make sure you select the “Advanced” tab and then click on “Environment Variables” button.
Step 6. This will open the below window.
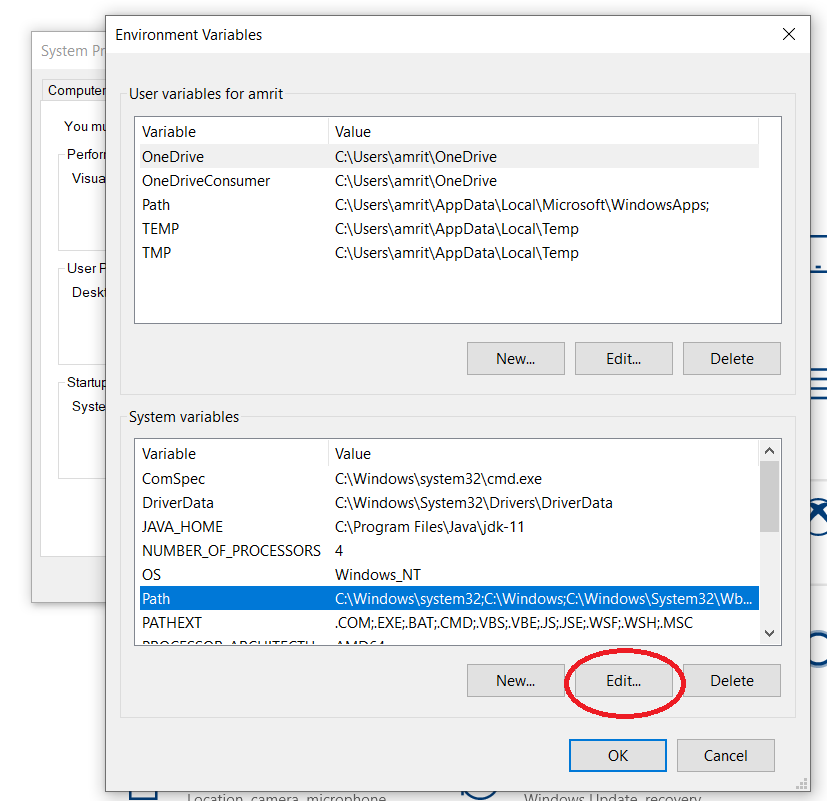
Select the Path variable and click on “Edit”.
Step 7. You will get to the Edit Environment Variable screen as shown below.
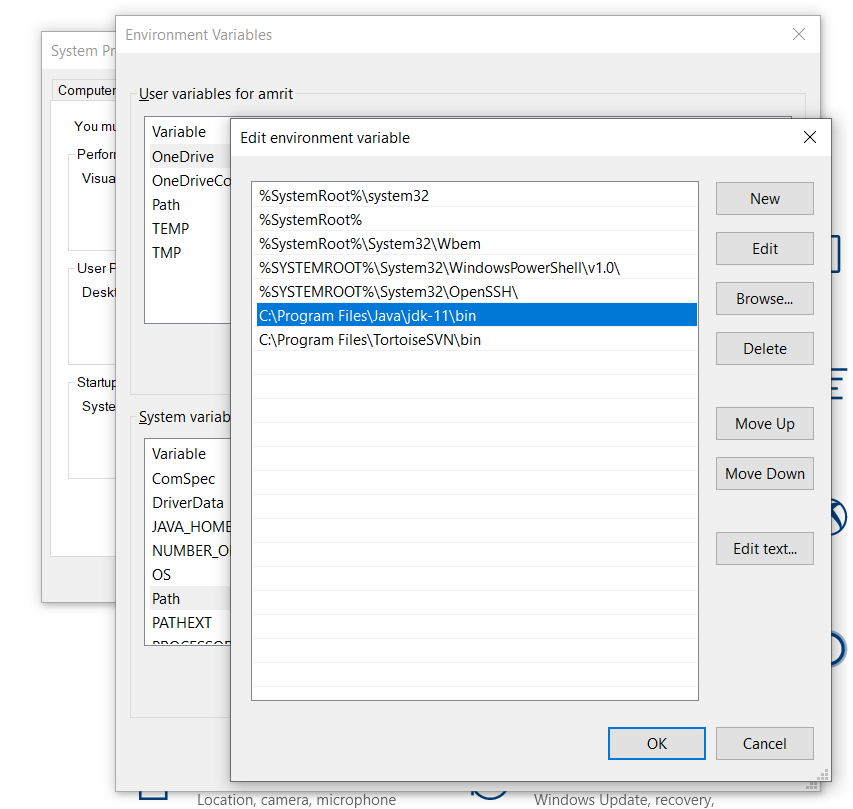
I have pasted the path to the bin folder in a new line as you can see above.
The next entry was made automatically when I installed NetBeans after the successful installation of the Open JDK.
Step 6. Click on “OK” once the above is done. In a similar way, close other dialog boxes. This should finally conclude the installation of the Open JDK environment.
Verify Successful Installation
We will ensure that the installation was indeed successful.
Open the Command prompt. In the Windows search bar, you can simply write cmd and press Enter.
At the command prompt, simply write the following:
java – -version
And now you should see something like the below screenshot.
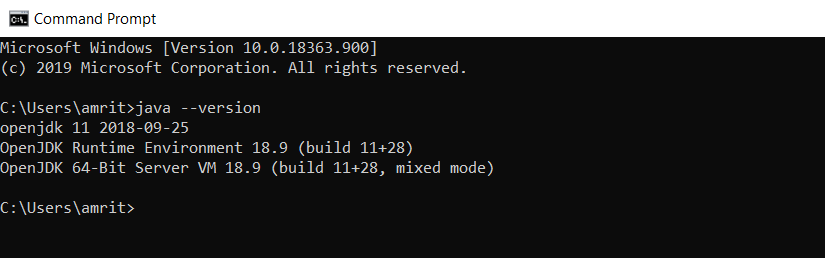
It displays the openjdk version and other Java environment details.
Now you can be sure that the required JDK is installed on your system.
I was able to install NetBeans after this easily.
Hope this helps someone.